The concept of a hanging indent in google docs is not common in writing. But because google docs are used in professional writing by students and researchers to write important documents, research papers, and academic writings, hanging indents are usually employed by these users.
Contents
What is a Hanging Indent in Google Docs?
A hanging indent is a formatting tool that, except the first line, makes all the subsequent lines indented more to the right. This is also called the second line indent or reverse indent. A hanging intent is referred to the space of 1/2 inch from the left margin and is usually used in MLA and APA citing format, where the first line is close to the left margin and the subsequent lines are indented.
You can create a hanging indent in google docs function of just a line, single paragraph, or your entire google document. It only depends on the format of your writing.
In google docs, a hanging indent is mainly used to make the document easier to read. Moreover, a hanging indent proves to be useful while preparing study notes or when you have to put additional notes in the left corner of the page. It is also convenient when you have to make lists since it gives the entire document a well-formatted look. Aside from this, it is crucial for making any reference list since these reference lists require the preferred setting of a hanging indent.
How to Employ the Hanging Indent in Google Docs?
Like it is with most google application tools, there is not only a single way to use the hanging indent in google docs. We can use the ruler as well as the menu option to create these indents. Let’s discuss how to achieve the hanging indent using both methods here.
1. Adding Hanging Indent by Using a Ruler
The first step of adding a hanging indent by means of a ruler is to make sure that the ruler itself is visible. If you cannot see the ruler tool, it can be easily accessed through the view icon in the menu bar.
Once you click “View“, you click on “Show Ruler” from the drop-down menu. This should display the ruler. Once this has been done, you can follow the following steps to make a hanging indent in your document.
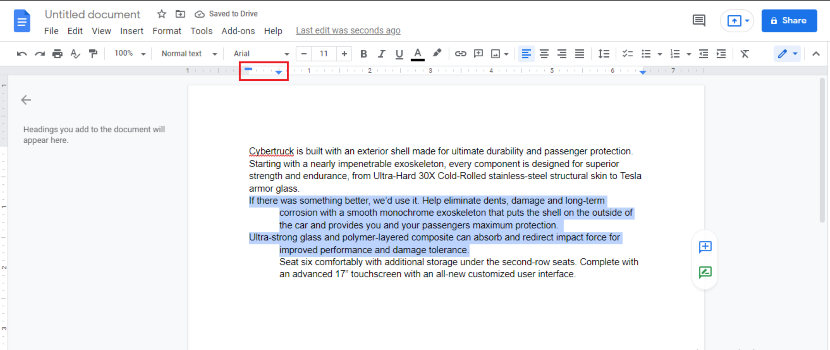
First, highlight the text you want to indent, which, as mentioned could be a single line or a whole paragraph. Here, we are highlighting an entire paragraph, thus, employing the hanging indent in google docs tool to the whole highlighted paragraph.
On the ruler, you will find two icons; the blue triangle which is the left indent marker, and a blue rectangle which is the left margin control.
When you click and drag the blue triangle (left indent marker) you will see the entire highlighted text shift towards the right and thus, become indented. The common indent depth is usually half an inch.
Now move the left margin control or the blue rectangle icon to the left till it reaches the ruler margin at the start.
By doing so, you will have the highlighted text indented towards the right with both of the first lines (involved in this particular portion of text) still starting from the left. The text that was not highlighted remained as it was before.
One thing you have to make sure while using the hanging indent in google docs function is that only the highlighted portion should be indented. If, for some reason, the entire grey area moves as well then you should try doing the entire process again.
2. Using the Menu Option
For adding the hanging indent through the menu option, first, open your google document like you normally would. Highlight the desired text you wish to indent.
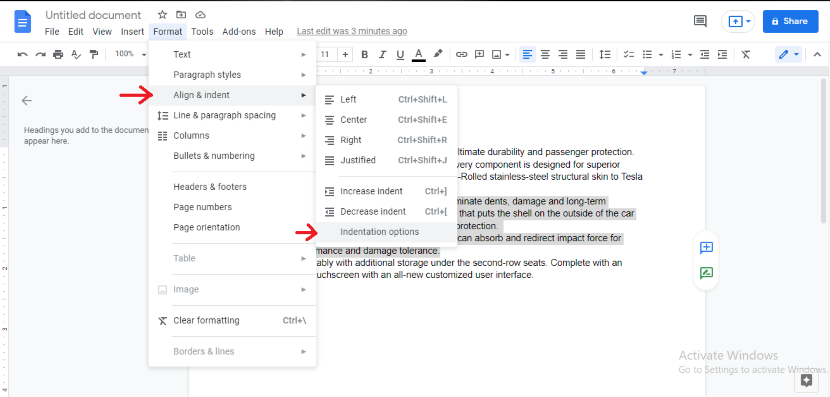
From the navigation bar, select the “Format” option. This will introduce a drop-down menu from which you have to hover your mouse over “Align & indent“. From the sidebar that has now appeared, click “Indentation options“.
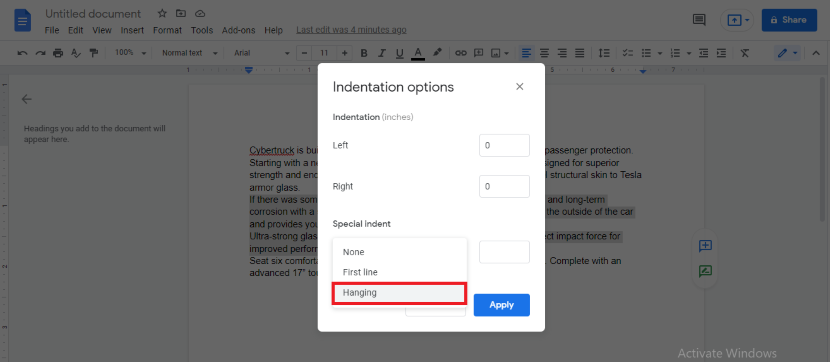
This will open up a window of “Indentation options“. Select “Hanging” from the emerged “Special Indent” dropdown menu.
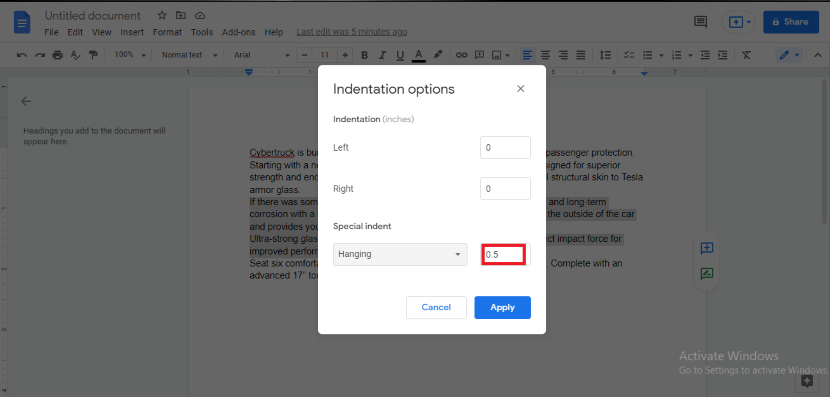
Once you select it, a new box will appear next to it where you can add the amount of indentation width according to your desired settings. The automatic value of the hanging indent in google docs is 0.5 which is the indent width in inches.
How to Create a Hanging Indent in Google Docs on your iPad?
To utilize the hanging indent in google docs tool using your iPad, you can follow the following steps:
1. Open your document (citation portion of the document specifically if you want to employ the hanging indent in google docs tool to your reference list) in google docs.
2. Highlight the text you wish to indent.
3. Click on the “A” in the top right corner of your application.
4. From the dropdown menu, select “Paragraph”.
5. Beside the “Line Spacing” option you will see two arrows. This value would be set at 1.5, click the arrow to extend it to 2 (2 is used as the official line spacing value for most writing formats). 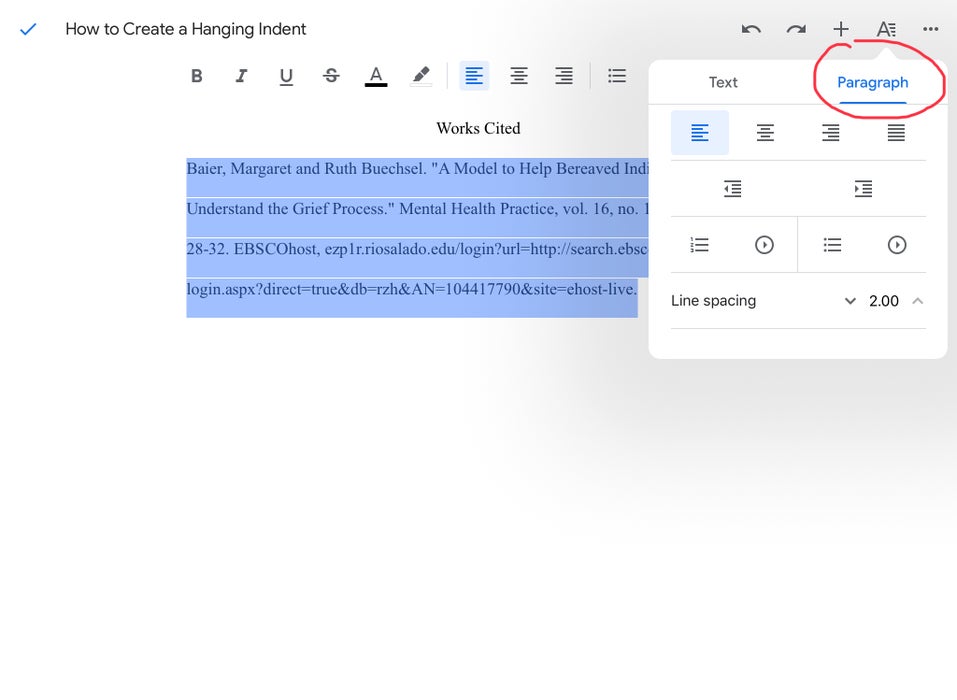
6. Click on the document to close the dropdown menu.
7. Now click the first line of your text and press the return key on your keyboard. You will see your cursor on the second line of your text.
8. Click the “A” again and this time select the ‘right indent’.
9. By the end, your text will have a hanging indent and a double space of 2.
Frequently Asked Questions
Q. How is a hanging indent in google docs different from a regular indent tool on google docs?
A regular indent is when the first line of your text is indented to the right whereas the rest of the document is indented to the left. In the case of a hanging indent, the first line starts from the left (the normal place) whereas, the rest of the paragraph would be indented to the right. The normal indentation is 0.5 inches.
Q. Why is my hanging indent not working?
Sometimes the hanging indent in google docs tool fails to work in your google document due to improper commands. Make sure you are giving the right instructions. Another reason why the tool isn’t functioning could be because you are pressing the ‘Enter’ key to force your text onto the next line. Once you highlight the text and follow the right steps for creating a hanging indent, there is no need to further enforce it using your keyboard buttons.
Q. What is a hanging indent APA?
The formatting style of APA referencing is the addition of a hanging indent in the second and the subsequent lines of about half an inch. This is done to break up different citations and make it easier for the audience to read and go through them.
Q. How do I adjust the indentation depth / width?
The regular indentation depth is at 0.5 inches. From the indentation options when you select ‘Hanging’, there is a box present next to it with 0.5 written on it. You can adjust the indentation depth according to your needs and requirements of the document (or format that you are using for that document) using that option.
The indentation is shown in inches and it is the space from the left margin of your document. You can easily increase and decrease the indentation using this box.