
While working on a group project, one that requires a research paper, there are usually quite a few people involved in the entire process. Therefore, during the documentation process, everyone is required to be involved and add their input to the writing process. This is why the best bet is to work on is Google Docs. The easy sharing and automatic saving of any changes made to the document allow the users to work stress-free on Google Docs.
Most of the formatting bits on Google Docs are also fairly easy to grasp, but accessing the table of contents Google Docs function could be a hassle.
The document you are to write and submit in case of a project requires you to be entirely professional with respect to the contents it entails and the formatting method it has adopted. This is why you cannot mess up the main attraction of the document that is the table of contents which is also the first thing anyone locates in any written document to see if it is worth the read, or in some cases, the money.
In this article, you can learn how to perfectly access the table of contents Google Docs tool. Moreover, you will be informed of the further features that Google Docs offers you to allow you free formatting and editing of the table of contents Google Docs tool. These added functions make the document more reader-friendly and visually appealing in addition to following the professional format.
Contents
What is the Table of Contents Google Docs Function?
While constituting a large piece of textual information, it is important to incorporate a table of contents section in the document. This is a page at the starting of your document that demonstrates all the main headings and topics/subtopics of the text. This table gives an overview of the contents that the reader would find inside the actual document. This allows readers to get an understanding of the document, be it a research paper, a thesis document, or a short novel with separate chapters. The readers can then determine whether they want to continue reading or not.
In the case of online documentation, you can provide the additional option of the clickable table of contents. Such a clickable table shows the list of contents in an article or document, but the difference is that the reader can choose the topic that relates to their interest, click on that particular heading from the table, and it would lead the person straight to that part of the text. This could save some straining scrolling through the text and not to mention a good amount of time.
How to Create Table of Contents in Google Docs?
The table of contents Google Docs function can be activated by first listing all the headings of the document using the proper heading format. This means that the table of contents will only identify that particular text as headings or subheadings that has been formatted accordingly using the in-built text styles in Google Docs.
Before we get into the “how to create table contents”, let’s first discuss how the different text styles alter the final table of contents of the document. Google Docs offers six headings styles from “Heading 1” to “Heading 6”. If a text has been written using the “Heading 1” style, then once the table of contents is generated, that particular text will automatically show up as the biggest and boldest heading.
Consequently, as you move ahead, your document would require the addition of subheadings and subtopics which you can enter using the styles “Heading 2” or “Heading 3” and so on. The table of contents Google Docs function will make sure to arrange all headings and subheadings in a neat and organized way.
Now that we’ve discussed the roles heading styles play, here is how you can access and use them:
- Open your document in Google Docs through your Google Drive or create a new document.
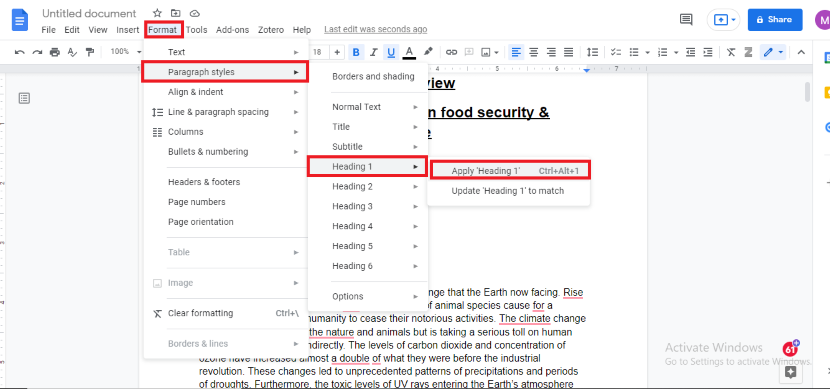
- Go to the “Format” menu in the menu bar.
- From the drop-down menu, select “Paragraph styles”.
- The paragraph styles offer 6 types of styles. The title of Headings 1 is for the main headings, Headings 2 is for the subheadings, Headings 3 for further subheadings and it works so on.
- Highlight all the main headings one by one and select Headings 1, then highlight the subheadings and select Headings 2 style, and further on to automatically switch them from “Normal text” to specific heading styles.

- Once you have formatted all your headings in such a way, you can view the list of the headings on the left side of your document in the “Document’s Outline” section
- You need to check the list if it is in accordance with the headings in your document because your table of contents needs to be mistake-free as the entire impression of your document relies on it.
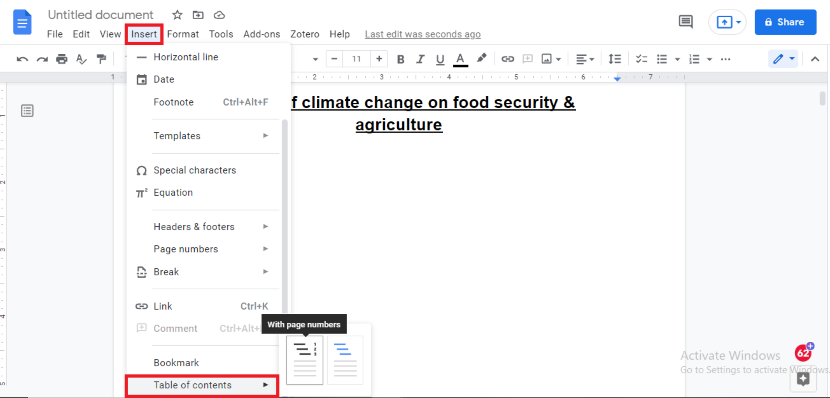
- Go to the top of your document, where you wish to add your table of contents (Usually placed after the introductory cover), and go to the “Insert” menu from the menu bar.
- From the drop-down menu select “Table of contents”. You can choose whether you want to add page numbers next to each heading or not depending upon your formatting requirements.

- If you need to relocate your table of contents you can simply hold and drag it to where you wish it to be.
- Another alternative to relocating your table of contents is to simply cut and paste it someplace else.
How to Edit your Table of Contents?
If, while going through your draft, you come upon some errors that are present in the table of contents, you cannot directly make edits to the table itself. Here is how you can:
- Find the heading that requires editing and make the changes there instead of the heading in the table itself.
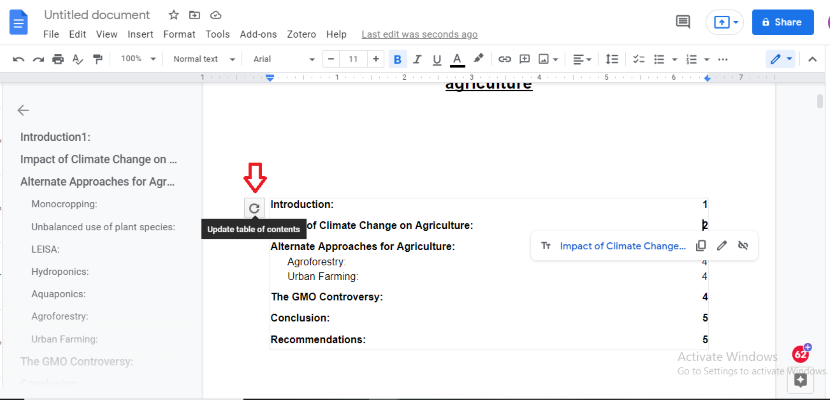
- Once you are done with your edits, you need to refresh the table of contents. You can do this by refresh the icon when you click on the table.

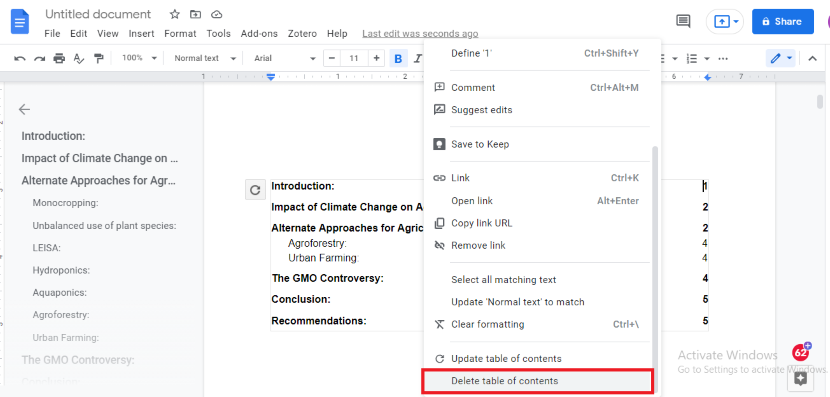
- If you wish to entirely delete your table of contents, you can left-click on it and select “Delete table of contents”.
How to Access the Clickable Table of Contents Google Docs Function?
As discussed earlier, a clickable table of contents is where the reader can click a heading in the table and they will instantly be taken to that part of the document. There are two ways one can successfully access the clickable table of contents Google Docs function, either automatically or manually. Following is a stepwise guide to both the alternatives:
a. Automatic Construct
The automatic way of constructing a table of contents is very similar to the steps mentioned above:
- Begin by making sure all the necessary text is in the appropriate heading style.
- Go to the “Insert” menu in the menu bar.
- From the drop-down menu, select the “Table of contents”.
- From the side menu, you will see two types of tables, one with numbers on them while the other with blue lines on them. Select the one with the blue lines.
- A clickable table of contents will now be added to your document.
b. Manual Construct:
Manually adding links to your table of contents could be a bit tedious (not to mention unnecessary) but here is how you can accomplish it:
- The first step is to make sure all necessary text is in the appropriate heading style according to your formatting requirements.
- For this method, you will have to select the table of contents type with page numbers instead of blue lines.
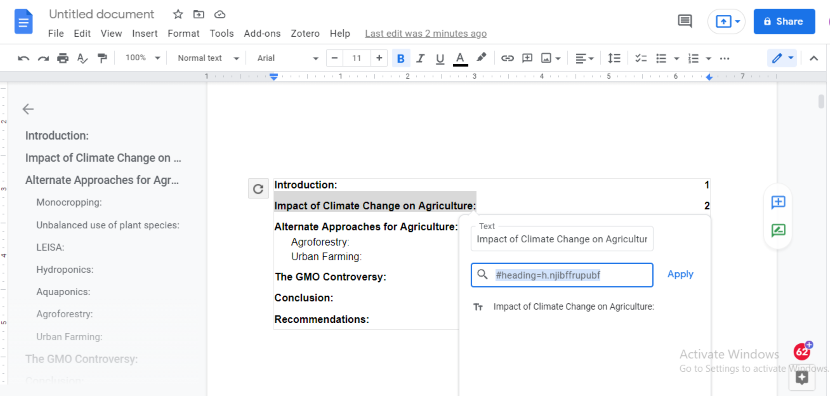
- Once the table of contents has been generated, select each heading where you wish to add a link, press Ctrl + K or Command + K (If you are an iOS user). This will open an “Add links” dialog box.
- The heading you have highlighted usually appears at the top of the list of the headings.

- If you are unable to locate your desired heading, you can search for it by clicking “Headings and Bookmarks” which are located at the bottom of the suggestion box. A list of all the headings will appear. You can then select the links from there.
How to Access Table of Contents Google Docs Function – iPhone/iPad?
The Google Docs app works slightly differently in iOS as it does in Android. But fear not, as we have got you covered either way. Following is the step-wise guide on how to add a table of contents in your Google Docs document using an iPhone or an iPad:
- Open your document in Google docs.
- On the top-right corner, tap the three-dot menu icon.
- From the drop-down menu, make sure the “Print layout” is enabled by tapping the toggle.
- To open the editing settings, click on the blue pencil icon at the bottom right corner.
- Click on the plus icon to start the editing.
- From the menu, select “Table of contents”. You will see two types of tables either one with page numbers or with blue links. If you have to print your document, you should go with the one that offers page numbers, however, if your text is to be used online it is better to use the blue link one.
- Once you are done, your table of contents will appear at the top of the page.